Categories
Administration

How To Fix Docker Compose failed to solve: rpc error: code = Unknown desc = error from sender: readdir On Windows 10

If you have run Docker Compose on Windows 10 and it has crashed with: failed to solve: rpc error: code = Unknown desc = error from sender: readdir: open c:\project The filename, directory name, or volume label syntax is incorrect.

Then you have come to the right place. The solution proposed is only one of the solutions available and is the one that has worked for me for most projects. It requires you to install WSL 2, a Linux Distribution image and to Docker integrations. Once this is done, you can open a Linux shell of your choice in Windows 10 and run docker compose up successfully.

So to summarize the steps are as follows:

  1. Install WSL 2
  2. Install a Linux Distribution of your choice e.g. Ubuntu 20.04
  3. Make sure Docker integration is set.
  4. Open Windows Terminal
  5. From Windows Terminal click the + sign and create a new Linux Shell for example: Ubuntu 20.04
  6. From there you should be able to run docker compose to completion

If you receive docker could not be found then check the post at: https://everythingtech.dev/2021/06/how-to-fix-docker-could-not-be-found-ubuntu-20-04-wsl-2-windows-10/

Hope this has helped you!

Categories
Administration

How To Fix docker could not be found With Ubuntu 20.04 WSL 2 On Windows 10

Step 1. Make sure you have installed Docker desktop and WSL 2

Step 2. Open up PowerShell and run the command below to list WSL available:

wsl --list --verbose

You should get something like the following screenshot:

Step 3. Run the following command to set Ubuntu-20.04 version 2 as default:

 wsl --set-default Ubuntu-20.04 2

If you list the WSLs available again you should see the following:

Step 4. Open up Docker Desktop, go to Settings->Resources->WSL Integration. You should then check the Ubuntu 20.04 checkbox.

That’s it! Once you click on “Apply & Restart” you should be able to run docker commands in your Ubuntu 20.04 shells!

Hope that this has helped 🙂

Categories
Ideas

How To Fix Overheating Issues On MSI Laptops Without Undervolting

If you are wary about undervolting like me then using Windows 10 to throttle the CPU might be the right solution for you. I was able to decrease the average temperature from 90 degrees to 70 degrees by capping CPU Usage which is basically what undervolting would have done anyway.

I encountered this issue with my new MSI G65 Thin laptop where the temperatures would soar to 92 degrees Celsius while running compute heavy tasks or playing video games, like Apex Legends.

Step 1 .You need to set Dragon Center to ultra performance (yes the max)

Step 2. You need to checkout the previous post on adjusting the maximum CPU usage on Windows 10.

Step 3. You need to download Core Temp https://www.alcpu.com/CoreTemp/ to monitor changes in temperature.

Step 4. Adjust the maximum CPU usage for “ultra performance” from 100% to 95% and set minimum CPU usage to 50%. Run the game and check the temperature. Continue to decrease the Max CPU usage until you have a satisfactory temperature.

Personally I have had to decrease it to 95% for the temperature to go down 92 degrees to 70 degrees.

Step 5 (optional). You can also modify the fan speed in the Dragon Center to always be at maximum. This should further reduce the temperature.

Step 6 (optional). You can also buy a laptop cooler stand. This should further decrease the average temperature.

I would suggest actually purchasing the laptop cooler online on Amazon because you should be able to return it in case you are not satisfied. Just make sure that you keep the box intact during unboxing and not to throw anything away. Below is a sponsored/affiliate link:

Below you can find graphs of before and after temperatures recorded solely by capping the CPU usage at 95% while playing Apex Legends. Note that I did not experience any FPS drops.

Hope that this has helped you decrease the CPU temperature of your laptop!

Categories
Administration Ideas

How To Throttle CPU Usage on Windows 10

  1. Go to Control Panel
  2. Then click on View By: Small Icons to see Power Options
3. Next click on Power Options and then Change Plan Settings
4. Click on Change advanced power settings

5. This should open a window with various advanced settings, scroll down and find Processor power management under which you can set the Maximum processor state which is the CPU usage.

In the screenshot we have throttled the maximum CPU usage to only 25%. In order to track the CPU usage you can download https://www.alcpu.com/CoreTemp/. With CoreTemp you can enable logging which will log CPU temperature and usage every 10 seconds by default. The logs are saved in the same directory as the .exe file which by default is at C:\Program Files\Core Temp.

Hope that this has helped you with managing your CPU usage and temperature!

Categories
Uncategorized

How To Fix: The specified user does not have a valid profile

Find below in this post, a series of steps to you with fixing “the specified user does not have a valid profile” when opening apps such as Nvidia Experience or MSI Dragon Center etc.

  1. Check if you are Administrator
  2. If you are Administrator check if you only have an online account signed in.
  3. Go to settings->Email & Accounts
  4. Click on add an account
  5. If that did not work then go to settings->Your Info
  6. Then click on Sign in with a local account instead

Once you are logged into your new account(local) the errors should be resolved. Hope that this has helped!

Categories
Development

Cannot use variable (variable of type []byte) as byte value in argument to append – compiler

If you are new to Golang like you were probably stuck on this error for a good 10 minutes at least when trying to combine to two byte arrays.

var array1 = make([]byte, 0)
var array2 = make([]byte, 0)
array1 = append(array1, array2)

This will error out with “Cannot use variable (variable of type []byte) as byte value in argument to append”. You don’t need to go code your own function to append every byte into the first array (what my first reflex was). Turns out append is a variadic function and you can just use the ellipsis notation as follows:

var array1 = make([]byte, 0)
var array2 = make([]byte, 0)
array1 = append(array1, array2...)

Hope this helps!

Categories
Development

Rust-Lang Formatting Syntax

There has been a buzz about Rust lang for a while so today I decided to embark on the journey to learn Rust lang with a plan to spend one hour every day on the official website https://doc.rust-lang.org/rust-by-example/.

Most of the explanations and activities were fairly straightforward requiring you to refer to this documentation https://doc.rust-lang.org/std/fmt/.

The only question which I felt left me a bit lost was the last one where you had to display a number in Hex and with padding. After going through the docs and realising that the following message actually meant that the format syntax was wrong:

   Compiling playground v0.0.1 (/playground)
error: invalid format string: expected `'}'`, found `'0'`
  --> src/main.rs:33:57
   |
33 |         write!(f, "RGB ({red}, {green}, {blue}) 0x{red:X02}{green:02X}{blue:02X}",
   |                                                   -     ^ expected `}` in format string
   |                                                   |
   |                                                   because of this opening brace
   |
   = note: if you intended to print `{`, you can escape it using `{{`

error: aborting due to previous error

error: could not compile `playground`

To learn more, run the command again with --verbose.

I went ahead to read the syntax part of the documentation at https://doc.rust-lang.org/std/fmt/#syntax

In there I found out that the order in which the format specifications is given is important. For example the above error happens because hex format spec should be after the padding i.e {red:X02} -> {red:02X}.

If you are curious the correct final code looks as follows:

use std::fmt::{self, Formatter, Display};

struct City {
    name: &'static str,
    // Latitude
    lat: f32,
    // Longitude
    lon: f32,
}

impl Display for City {
    // `f` is a buffer, and this method must write the formatted string into it
    fn fmt(&self, f: &mut Formatter) -> fmt::Result {
        let lat_c = if self.lat >= 0.0 { 'N' } else { 'S' };
        let lon_c = if self.lon >= 0.0 { 'E' } else { 'W' };

        // `write!` is like `format!`, but it will write the formatted string
        // into a buffer (the first argument)
        write!(f, "{}: {:.3}°{} {:.3}°{}",
               self.name, self.lat.abs(), lat_c, self.lon.abs(), lon_c)
    }
}

#[derive(Debug)]
struct Color {
    red: u8,
    green: u8,
    blue: u8,
}

impl Display for Color {
    fn fmt(&self, f: &mut Formatter) -> fmt::Result {
        write!(f, "RGB ({red}, {green}, {blue}) 0x{red:02X}{green:02X}{blue:02X}",
               red=self.red, green=self.green, blue=self.blue)
    }
}

fn main() {
    for city in [
        City { name: "Dublin", lat: 53.347778, lon: -6.259722 },
        City { name: "Oslo", lat: 59.95, lon: 10.75 },
        City { name: "Vancouver", lat: 49.25, lon: -123.1 },
    ].iter() {
        println!("{}", *city);
    }
    for color in [
        Color { red: 128, green: 255, blue: 90 },
        Color { red: 0, green: 3, blue: 254 },
        Color { red: 0, green: 0, blue: 0 },
    ].iter() {
        // Switch this to use {} once you've added an implementation
        // for fmt::Display.
        println!("{:}", *color);
    }
}

Hope this helped you if you were stuck in Rust-Lang formatting question. I am also streaming learning Rust live at https://www.twitch.tv/lougarou_ everyday at 8pm GMT+4 if you are interested to learn together with me.

Categories
Uncategorized

Tips For Starting A Successful Twitch Channel

A little bit of a back story to starting a Twitch channel. I am an old time Dota player and so is my circle of friends. So when me and a couple of friends decided to pick up Apex Legends, the rest of my friends could not spectate our matches.

I am playing on my PS4 and there is an option to broadcast gameplay to Twitch which doesn’t require anything apart from an authorisation(but this is guided too so basically you just need to click ok at every step and may be enter a login). So here I am streaming on Twitch.

I noticed that people started to follow me and at first I thought that they were my friends but from the insights tabs it looks like the followers and the viewers were from other countries.

So I was curious and decided to research for methods to be successful in Twitch (hopeful with the low number of viewers that I had) because I am here spending around one hour everyday streaming my games anyway. It made sense to see if there were any money in it.

My research led me to this list of tips to increase your success rate at Twitch streaming (and may be to reach affiliate). Note that this is mostly a compilation of what I gather from Youtube, Reddit and my own experience streaming for a month.

This can also serve as a checklist if you are blocked in your journey as a streamer and want to try something new!

Build A community


The majority of Twitch streamers who are famous have realized that building an online community is essential for this platform’s success. You’ll probably start small, with only a few people in your chat room, but if you stick with it and prove that you care about the people who show up, you’ll soon create a group that would love to watch you.

But you need to go beyond Twitch to build your community. Ideally use your Twitter or Facebook account to first get your friends in the community. Create an additional following on Discord or Facebook group or Reddit. Look at it as an investment.

Choosing Which Games to Stream

Look I know that streaming needs to be fun and just playing any games might not be fun so if you don’t want to do this tip it’s fine. Enjoying the process is also a big part of anything that you do and not just streaming. But if you can afford to do it, choose a game with a low number of viewers and stream that. To give you an idea when I stream Yakuza Like A Dragon I get 3 times more viewers than when I stream Apex Legends which is one of the most popular games on Twitch.

Watch Your Own Stream Live

Well this is more of a “hack”. Create an additional account and watch yourself play on your mobile phone. This will beat the 0 viewer problem and actually will make it easier for people browsing Twitch to find your streams.

Follow To Follow

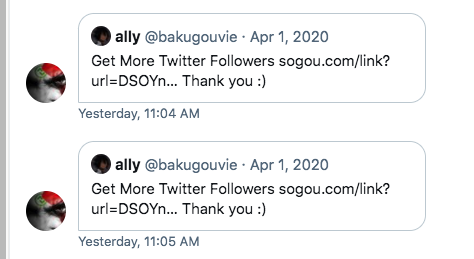
This might sound like a cheap idea if you have heard of it before. This basically means if you follow someone then that someone will also follow you. If you want an example of this you should check out https://twitchstrike.com/ At first I thought that I would get fake followers like in the Twitter post I wrote before.

But turns out that small streamers are really a different breed. They have it at heart to build their following and are willing to take the time to watch your stream, chat while the streams are going on and become your friend. Once you establish a relationship with them you should also consider to auto-host among yourself.

What auto-host basically does is that when you go on your channel the viewer will see which streams you suggest or find your friend’s(or yours) livestream which is great.

Streaming Gear

If you have a PS4 you can start streaming right away albeit without a cam but nothing you can’t solve. If you have a PC though you might need to invest some more.

For your PC, you can also aim for mid-to-high-end specifications. Your CPU should have at least four cores and eight threads, preferably eight cores and sixteen threads. Another requirement is to have at least 16GB of RAM and an (SSD) for data storage.
For gaming and some encoding, you’ll also need a modern GPU like an NVidia 2060, 2070, 2080, or an AMD Vega or RX 590.
Point to note: You’ll need a capture card if you’re going to play console games.

Fast and reliable internet service

Secure and fast internet access is essential for starting a successful twitch channel. An upload speed of at least 3.5 Mbps is needed for streaming in high definition (720p or higher).

Streaming software 

For creating and uploading streams to Twitch through your PC, you’ll need third-party streaming tools. Thankfully, streaming tech has improved dramatically in the past few years. 

The two major providers are OBS and XSplit, and each has its own set of advantages and disadvantages. Before deciding which to choose, you need to search them both.

Design Your Twitch Channel 

To increase your chances at a successful channel on Twitch, you will need to put some effort into completing your profile. A small about me and links to your social media and community.

You are not required to create Twitch banners, emotes, or other profile photos, but it will surely be helpful.

My recommendation is to ask an artist you know to design some art for your Twitch channel. You’ll generally get something unique than you might make yourself, and your fans will love your channel’s distinct look.

If you can afford to pay the artist please do so, if not then at least refer him by putting a section about him in your profile or channel panels.

Schedule

Set a schedule but really if you are like working a 9 – 5 job then the schedule will form naturally. Based on what I have seen from research this seems to be an important point to let people know when you stream.

On the viewer side personally I have never cared about the streamer’s schedule but may be that’s just because I work most of the time.

Don’t Set Unrealistic Goals

I have seen many streamers set unrealistic goals on Reddit and Youtube only to get depressed at the end for failing to meet those goals.

The final tip here is to set really small goals like a few followers every week and to enjoy the journey. We are now in 2021 and you have already missed the early joiner advantage to Twitch.

The chances of you succeeding is decreasing with more streamers coming to the platform everyday and this is the truth that many will not tell you.

Final Words

You will probably disagree with many parts about what I said and you have the right to. But I hope that you will have learned something new from reading this blog post because if you did that would make me happy.

Categories
Uncategorized

How to fix stuck on retry for Apex Legends on PS4

  1. Stay on the retry screen
  2. Minimise your screen by pressing the PS4 button
  3. Go to Settings then Network and then Test Connection
  4. Wait for the PlayStation Netowrk Sign-In check to complete
  5. Then go back to the game and press X to retry again.

This should hopefully fix your issue!

Categories
Uncategorized

Buying Twitter Followers on Fiverr Review

This article is a review of me buying the services or I should rather say buying a “gig” on Fiverr for 10$ to get me more Twitter Followers. This blog is new and so was is Twitter profile https://twitter.com/Everyth51012807.

The Gig

The main criteria that I wanted to use to choose the gig was that it should be legal. Most of the gigs that are on Fiverr seem to be using bots but I wanted one that was different. So after searching for a while I stumbled a gig which required me to provide my login to Twitter(Username and Password). This is a really bad idea and you should never have to provide any information like that. But it was a new Twitter account with 7 followers so I decided to go ahead with that.

before
Before

How did she do it?

So the gig was advertised as I would manage your Twitter account and grow your Followers. Sure enough, a few days later I noticed that my Following count had drastically increased, wiped out and then drastically increased again. With every cycle slowly increasing my Follower count. I took a few screenshots along the way that you can see below:

28_03_2021
28/03/2021
29_03_2021
29/03/2021

Who are the followers?

This looked like great progress and I was intrigued! I had to know who the followers were and if they in fact interested in what I was writing. I was actually tweeting links to my blog during the whole process. I had a few engagements here and there but nothing significant. Also all engagements were from non-Followers. So who were they?

twitter_bots
Twitter Bot Follower Sellers
follow backers
Follow Backers

Follow Backers

The Twitter bot part is self explanatory I think. The “Follow Backers” like I have named them are a common thing on Twitter. The rule is simple if you follow me, I will follow you back. And in this way this is an easy way to grow your Twitter Followers. What she was doing was looking for those Follow Backers(and sadly those selling Twitter followers) and following them. The thing which sucks with Follower Backers is that for many of them, they will stop following you after a while. You can see this in the after picture below.

Other Issues

twitter_account_not_available_image
Account Restricted

This is not normal behaviour and Twitter knows it. You will constantly have your account restricted and this is shown to anyone ones who hits your Twitter profile. So your whole profile will be unavailable a significant number of times during the 1 week process (like daily).

Review

So my review is that please don’t waste your money on this. The followers are fake and do not care about your profile. They will actually slowly start to unfollow you. 10 Bucks wasted but mystery resolved.

after
After
few_days_after_after
A few days after “After”

Anyway I hope this has saved you 10 bucks. The best way to get Twitter followers is to be genuine, to engage and to share meaningful content.